
Start Your Money Saving Journey At Home✨💅🏻
What Are the Best Nail Treatments for Healthy Nails in 2025

Your nails deserve the best care, and choosing the right nail treatments can make all the difference in keeping them healthy. Whether you’re a fan of bold designs or prefer a natural look, the options in 2025 are better than ever. Dip powder, gel polish, traditional nail polish, and acrylics are leading the way, offering something for everyone.
Consumers today are leaning toward safer, eco-friendly products, and the demand for high-quality, durable nail solutions is growing. With so many choices, it’s essential to use products that protect your nails and follow proper application and removal techniques. After all, healthy nails start with smart decisions.
Key Takeaways
-
Use good-quality nail products to keep nails safe and pretty.
-
Stay away from harmful chemicals like formaldehyde and toluene.
-
Pick products with '5-free' or '10-free' labels to avoid toxins.
-
Dip powder nails are easy to use and last a long time.
-
Apply and remove nail products carefully to avoid hurting your nails.
-
Use cuticle oil every day to keep nails strong and not dry.
-
Take breaks between nail treatments so your nails can rest.
-
Make a habit of trimming, cleaning, and moisturizing your nails often.
Why High-Quality Products Are Essential for Nail Treatments
When it comes to keeping your nails healthy, the products you choose play a huge role. High-quality nail treatments not only enhance your look but also protect your nails from damage. Let’s dive into why selecting the right products matters and how you can make smarter choices.
Avoiding Harmful Ingredients in Nail Products
Not all nail products are created equal. Some contain harmful chemicals that can wreak havoc on your health. Here are a few ingredients you should avoid:
-
Dibutyl phthalate (DBP): Linked to liver and kidney damage.
-
Toluene: A neurotoxin that can harm your nervous system.
-
Camphor: May cause dizziness, nausea, or allergic reactions.
-
Formaldehyde: Known to trigger asthma and skin allergies.
-
Triphenylphosphate (TPHP): Can disrupt hormones and affect development.
These ingredients don’t just harm your nails—they can impact your overall health. For example, formaldehyde and toluene are associated with respiratory issues, while DBP can affect your reproductive system. Choosing products free from these chemicals is a simple way to keep your nails and body safe.
Tip: Always check the ingredient list before buying nail products. If you see any of these harmful chemicals, it’s best to steer clear.
Benefits of Using Regulated and Safe Products
Using regulated, high-quality products offers more than just peace of mind. These products are designed to protect your nails while delivering stunning results. Here’s why they’re worth it:
-
They’re free from toxic ingredients, reducing the risk of allergies or irritation.
-
They strengthen your nails, helping them stay healthy and less prone to breakage.
-
They’re often eco-friendly, which means they’re safer for you and the environment.
For example, many high-quality nail treatments now use "5-free" or "10-free" formulas. These labels mean the products don’t contain harmful chemicals like formaldehyde, DBP, or toluene. By choosing these safer options, you’re investing in your nail health and overall well-being.
Tips for Identifying High-Quality Nail Products
Finding the right products doesn’t have to be overwhelming. Here are some tips to help you spot high-quality options:
-
Look for certifications: Products labeled as "5-free" or "10-free" are a great start.
-
Read reviews: Other users can provide valuable insights into a product’s safety and effectiveness.
-
Check the packaging: High-quality brands often include detailed ingredient lists and safety information.
-
Test small amounts: If you’re unsure, try a patch test to check for any adverse reactions.
Note: Investing in high-quality products might cost a bit more upfront, but it saves you from potential health issues and nail damage in the long run.
By avoiding harmful ingredients, choosing regulated products, and following these tips, you can enjoy beautiful, healthy nails without compromising your well-being.
Dip Powder Nails: A Beginner-Friendly Nail Treatment
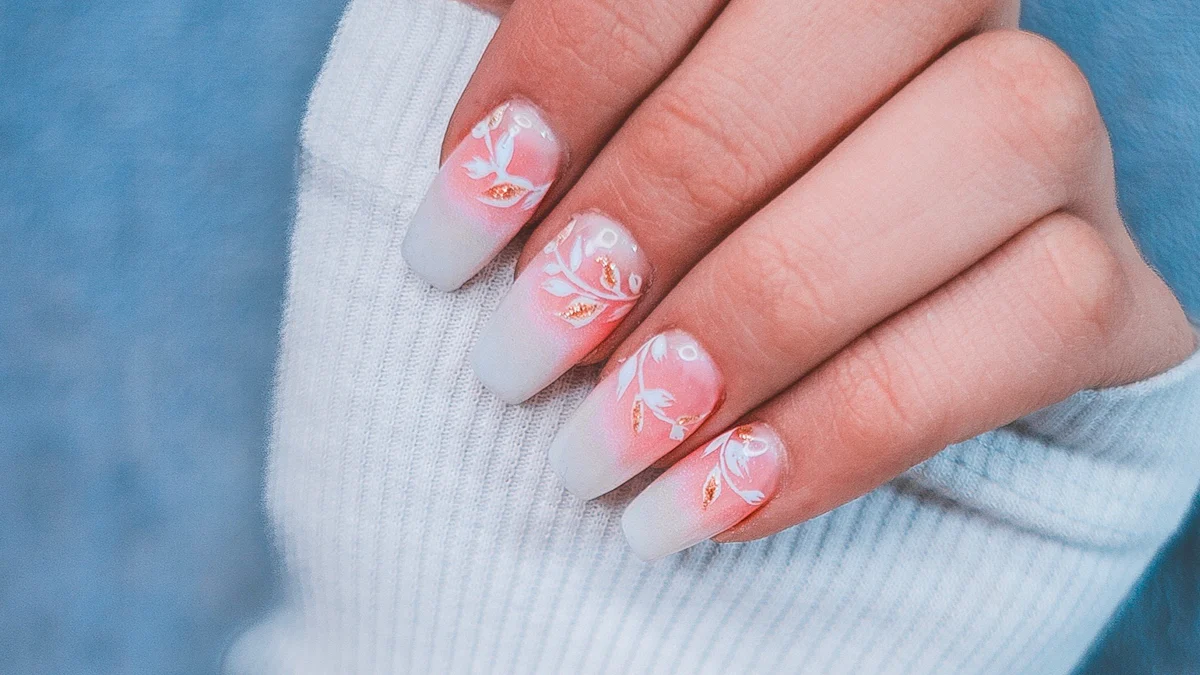
If you're new to nail treatments, dip powder nails might just be your perfect match. They’re easy to apply, long-lasting, and gentle on your natural nails. Let’s explore why this treatment is so popular and how you can make the most of it.
Benefits of Dip Powder Nails
Dip powder nails offer a ton of perks that make them stand out from other treatments. Here’s why you’ll love them:
-
Durability: They last longer than traditional manicures without chipping or peeling, giving your natural nails time to grow.
-
Lightweight and flexible: Unlike acrylics, dip powder feels light and natural, reducing the risk of breakage.
-
No UV exposure: You don’t need UV light to cure dip powder, which means no harmful rays on your skin or nails.
-
Nail-friendly nutrients: Many dip powders are infused with vitamins to nourish and strengthen your nails.
-
Gentle removal: Removing dip powder is less harsh compared to other treatments, especially when done correctly.
-
Variety of colors: From bold shades to subtle finishes, dip powder offers endless options for every style.
This treatment is also great for sensitive nails. Its non-toxic and non-acidic formula makes it a safe choice if your nails are prone to irritation.
Common Risks and How to Avoid Them
While dip powder nails are generally safe, there are a few risks to watch out for. Here’s what you need to know:
-
Fungal infections: Improper application or poor hygiene can lead to infections. Always ensure tools are sanitized and visit a trained professional if possible.
-
Allergic reactions: Some people may react to ingredients in the powder. To minimize this, work in a well-ventilated area and wear a mask during application.
-
Damage from improper removal: Peeling or scraping off dip powder can weaken your nails. Stick to safe removal techniques to avoid harm.
By following proper hygiene and application practices, you can enjoy the benefits of dip powder without the downsides.
Know The Application and Removal Process
Applying and removing dip powder nails is easier than you might think. Here’s a simple guide to get you started:
Application:
-
Prep your nails by cleaning and buffing them.
-
Apply a base coat and dip your nails into the powder.
-
Repeat the process for even coverage.
-
Seal with an activator and top coat for a smooth finish.
Removal:
-
Soak cotton in acetone and wrap it around your nails with foil.
-
Wait 10-15 minutes, then gently scrape off the softened powder.
-
Rehydrate your nails with cuticle oil and a nail strengthener.
Tip: Take breaks between applications to let your nails breathe and recover. This helps maintain their health over time.
Dip powder nails are a fantastic option for beginners. With the right techniques and care, you’ll enjoy stunning, long-lasting results without compromising your nail health.
Tips for Beginners Using Dip Powder Kits
Starting with dip powder kits can feel a little intimidating, but don’t worry—you’ve got this! With the right approach, you’ll master the process in no time. Here are some beginner-friendly tips to help you get started and achieve salon-quality results at home.
1. Choose the Right Kit
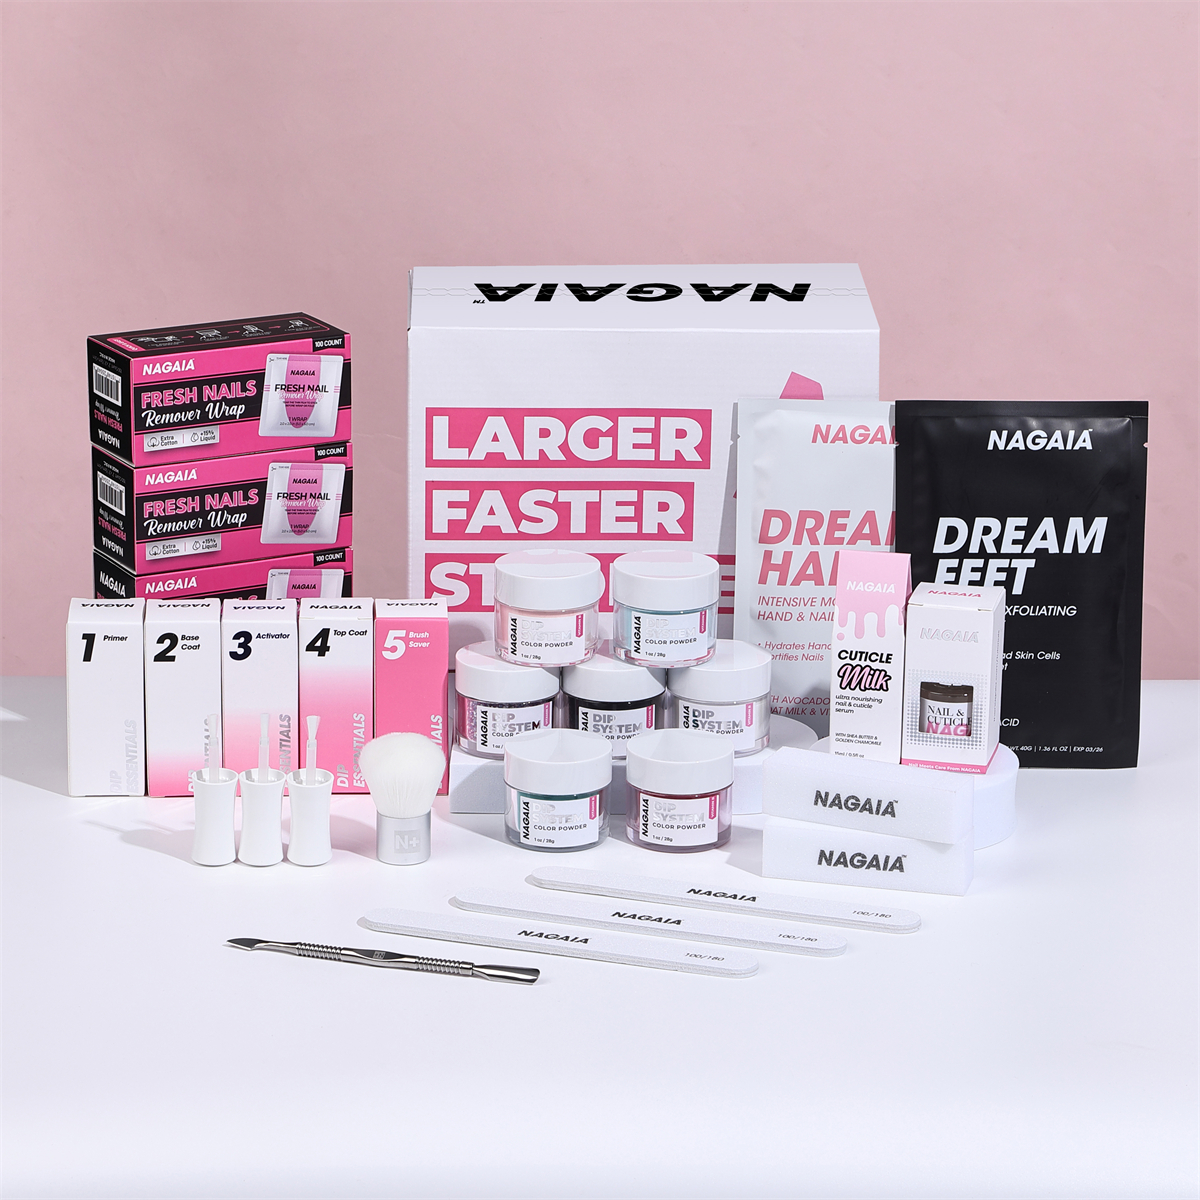
Not all dip powder kits are created equal. Look for one that includes everything you need, like a primer, base coat, activator, top coat, brush saver, and powders. Check reviews to see what other beginners recommend. A high-quality kit makes the process smoother and ensures better results.
Tip: Start with a smaller kit if you’re unsure. It’s a great way to test the waters without spending too much.
2. Prep Your Nails Properly
Preparation is key to a flawless dip powder manicure. Clean your nails thoroughly and push back your cuticles. Buff the surface lightly to remove any shine. This helps the powder adhere better and last longer.
Note: Avoid over-buffing. It can weaken your nails and make them more prone to damage.
3. Work in Thin Layers
When applying the base coat and dipping your nails into the powder, less is more. Thin, even layers prevent clumping and give you a smooth finish. If you want more coverage, you can always add another layer.
4. Avoid Rushing the Process
Take your time with each step. Let the activator dry completely before applying the top coat. Rushing can lead to smudges or uneven finishes. Patience pays off when it comes to dip powder nails.
5. Keep Your Workspace Clean
Dip powder can get messy if you’re not careful. Work on a flat surface and use a tray or paper towel to catch any excess powder. This keeps your workspace tidy and makes cleanup easier.
6. Practice Makes Perfect
Your first attempt might not be perfect, and that’s okay! The more you practice, the better you’ll get. Experiment with different techniques and find what works best for you.
Pro Tip: Watch tutorials online. Seeing the process in action can help you understand the steps better.
7. Take Care of Your Tools
Clean your brushes and bottles after each use. This prevents the products from hardening and keeps your kit in good condition. Proper maintenance extends the life of your tools and ensures consistent results.
8. Don’t Skip Aftercare
Once you’ve finished your manicure, hydrate your nails with cuticle oil. This keeps them nourished and prevents dryness. Healthy nails are the foundation of any great manicure.
Reminder: Give your nails a break between applications. It helps them stay strong and healthy.
By following these tips, you’ll feel more confident using dip powder kits. With a little practice and patience, you’ll create stunning, long-lasting nails that look like they came straight from the salon. So grab your kit and start experimenting—you’ve got this!
Gel Polish: A Stylish and Protective Nail Treatment
Gel polish has become a favorite among nail enthusiasts, and it’s easy to see why. This nail treatment combines style and protection, giving you a polished look while keeping your nails healthy. Whether you’re a busy professional or someone who loves experimenting with nail art, gel polish offers a versatile solution.
Benefits of Gel Polish for Nail Health
Gel polish isn’t just about aesthetics—it’s also a practical choice for maintaining healthy nails. Here’s what makes it stand out:
-
It lasts for two to three weeks (or even longer) with proper care, making it perfect for those with packed schedules.
-
The glossy finish enhances your nails’ appearance, giving them a sleek, polished look.
-
Gel polish cures quickly under UV or LED lights, so you can get back to your day in no time.
-
Its flexibility reduces the risk of nail breakage, unlike more rigid options like acrylics.
-
The application process produces less odor, making it a more pleasant experience.
If you’re looking for a nail treatment that combines durability, style, and protection, gel polish is a fantastic option.
Risks of Improper Application and Removal
While gel polish has many benefits, improper application or removal can harm your nails. Here are some risks to watch out for and how to avoid them:
-
Ensure tools are sterilized to prevent infections. Avoid cutting your cuticles, as this can lead to irritation.
-
If you have recurring nail issues or acetone allergies, consider using traditional nail polish instead.
-
Apply sunscreen to your hands before curing under UV lights to protect your skin from radiation.
-
Never pick at gel polish. Always have it professionally removed to avoid damaging your nails.
-
During removal, soak only your fingertips in acetone to protect the surrounding skin.
Improper removal can weaken your nails. Soaking in acetone and aggressive buffing may injure the nail plate, leaving your nails brittle and dry. To keep your nails healthy, avoid scraping or over-buffing. Always follow safe practices for application and removal.
Application and Removal Process for Gel Polish
Applying and removing gel polish doesn’t have to be complicated. With the right steps, you can achieve salon-quality results at home.
Application:
-
Start by cleaning and shaping your nails. Push back your cuticles gently.
-
Apply a thin base coat and cure it under a UV or LED light.
-
Add two thin layers of gel polish, curing each layer under the light.
-
Finish with a top coat and cure it for a glossy, long-lasting finish.
Removal:
-
File the top layer of the gel polish to break the seal.
-
Soak cotton pads in acetone and place them on your nails. Wrap each nail with foil.
-
Wait 10-15 minutes, then gently push off the softened polish with a cuticle stick.
-
Rehydrate your nails with cuticle oil to restore moisture.
Tip: Always give your nails a break between gel polish applications. This helps them stay strong and healthy over time.
Gel polish is a stylish and protective nail treatment that works for almost everyone. By following these steps and taking care of your nails, you can enjoy beautiful, long-lasting results without compromising your nail health.
Tips for Achieving Long-Lasting Gel Polish Results
Getting the most out of your gel polish doesn’t have to be tricky. With a few simple tips, you can keep your manicure looking fresh and flawless for weeks. Here’s how you can make your gel polish last longer while keeping your nails healthy.
1. Prep Your Nails Like a Pro
Proper nail prep is the foundation of a long-lasting gel manicure. Start by cleaning your nails thoroughly to remove any oils or residue. Buff the surface lightly to create a smooth base for the polish to adhere to. Don’t forget to push back your cuticles—this prevents the polish from lifting at the edges.
Tip: Avoid soaking your nails in water before applying gel polish. Water can cause your nails to expand, leading to chips once they dry and shrink.
2. Apply Thin, Even Layers
When it comes to gel polish, less is more. Thick layers can lead to uneven curing and peeling. Instead, apply thin, even coats and cure each layer under the light. This ensures a smooth, durable finish that lasts.
Pro Tip: Cap the free edge of your nails (the tip) with each layer of polish. This seals the edges and helps prevent chipping.
3. Avoid Overexposure to Water
Excessive water exposure can weaken the bond between your gel polish and nails. Try to wear gloves when doing dishes or cleaning. If you’re heading to the pool, keep your hands out of the water as much as possible.
4. Be Gentle with Your Nails
Your gel manicure might be tough, but your nails still need care. Avoid using them as tools to open cans or scrape off stickers. Treat your nails gently to prevent cracks or chips.
Reminder: If you notice a small chip, don’t peel or pick at the polish. This can damage your natural nails. Instead, file the chipped area gently and apply a clear top coat to seal it.
5. Use Cuticle Oil Daily
Hydration is key to keeping your nails and gel polish looking their best. Apply cuticle oil daily to nourish your nails and prevent dryness. Healthy nails are less likely to break or peel, which helps your manicure last longer.
6. Invest in a Quality Top Coat
A high-quality top coat can make all the difference. It adds an extra layer of protection and keeps your gel polish shiny and smooth. Reapply the top coat every few days to maintain that fresh, salon-like finish.
7. Take Breaks Between Applications
While gel polish is durable, your nails need time to recover. After removing your gel manicure, let your nails breathe for a few days before reapplying. Use this time to hydrate and strengthen your nails with a nourishing treatment.
Note: Overusing gel polish without breaks can weaken your nails over time. A little rest goes a long way in keeping them healthy.
By following these tips, you’ll enjoy a long-lasting gel manicure that looks amazing and keeps your nails in great shape. With a little care and attention, your gel polish can stay flawless for weeks. So go ahead, show off those gorgeous nails—you’ve earned it!
Nail Polish: The Classic Nail Treatment Option
Traditional nail polish has been a go-to choice for decades, and it’s easy to see why. It’s versatile, affordable, and perfect for expressing your style. Whether you’re heading to a party or just want a pop of color, this classic nail treatment has you covered.
Benefits of Traditional Nail Polish
Traditional nail polish offers plenty of perks that make it a favorite for many. First, it’s incredibly easy to use. You don’t need fancy tools or a lot of experience to get started. Just grab a bottle, a brush, and you’re good to go.
Another big plus is the variety. You’ll find endless colors, finishes, and effects to match any mood or occasion. From glossy reds to matte pastels, there’s something for everyone.
It’s also budget-friendly. Compared to other nail treatments, traditional polish is much more affordable. You can experiment with different shades without breaking the bank.
Lastly, it’s gentle on your nails. Unlike gel or acrylics, traditional polish doesn’t require harsh chemicals or UV lights. This makes it a safer option if you’re looking to keep your nails healthy.
Limitations for Weak or Soft Nails
While traditional nail polish has its advantages, it’s not perfect for everyone. If your nails are weak or soft, you might notice some challenges.
For starters, traditional polish doesn’t provide much strength or protection. It’s more of a cosmetic solution than a structural one. If your nails are prone to breaking, you might need something more durable, like gel polish or dip powder.
Chipping is another issue. Traditional polish tends to chip faster, especially if your nails are brittle. This means you’ll need to touch up or reapply more often, which can be time-consuming.
Finally, frequent use of acetone-based removers can dry out your nails and cuticles. If your nails are already fragile, this could make them even weaker. To avoid this, try using a non-acetone remover or limit how often you change your polish.
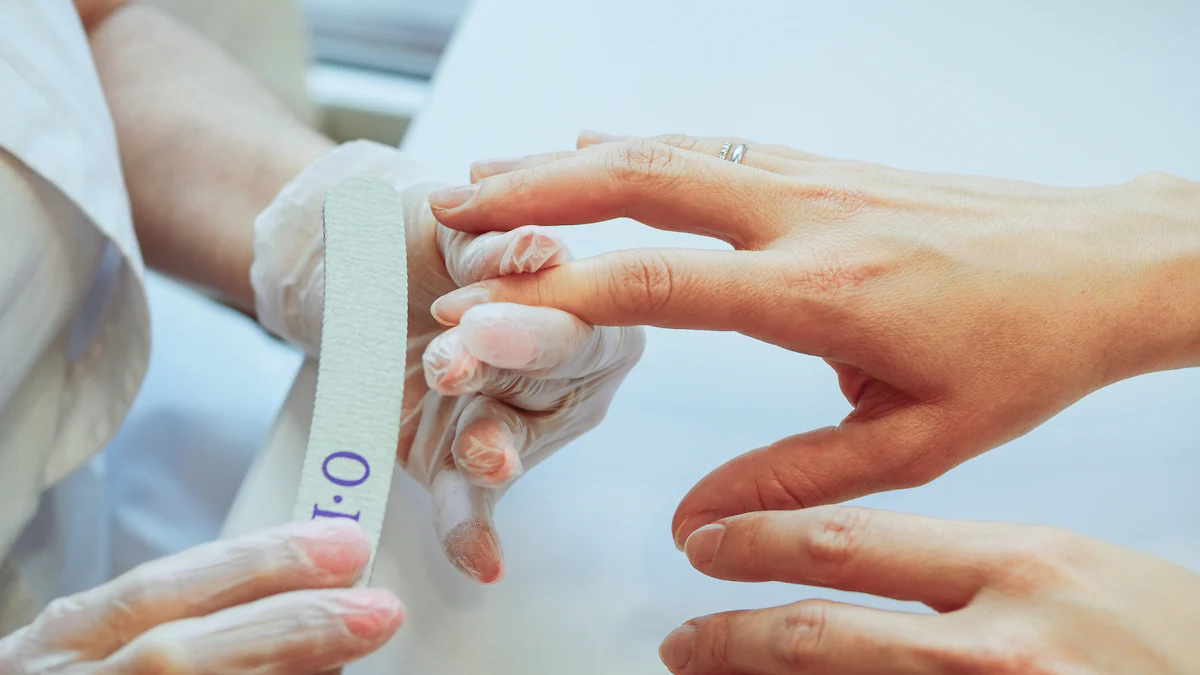
Application and Removal Process for Nail Polish
Applying and removing traditional nail polish is simple and straightforward. Here’s how you can do it like a pro:
Application:
-
Start by cleaning your nails to remove any oils or residue.
-
Apply a base coat to protect your nails and create a smooth surface.
-
Add two thin layers of your chosen polish, letting each layer dry completely.
-
Finish with a top coat to seal the color and add shine.
Tip: Avoid shaking the bottle before use. Instead, roll it between your hands to prevent air bubbles.
Removal:
-
Grab a bottle of nail polish remover with acetone and some cotton balls.
-
Soak a cotton ball in the remover and press it onto your nail.
-
Gently rub until the polish comes off completely.
-
Wash your hands and apply cuticle oil to rehydrate your nails.
If you prefer a professional touch, visit a nail salon. Technicians have the tools and expertise to remove polish safely and efficiently.
Traditional nail polish is a timeless option that’s easy to use and perfect for everyday wear. With the right techniques and a little care, you can enjoy beautiful nails without any hassle.
Tips for Maintaining Natural Nails with Nail Polish
Keeping your natural nails healthy while enjoying your favorite nail polish doesn’t have to be tricky. With a little care and attention, you can rock beautiful nails without sacrificing their strength or health. Here are some simple yet effective tips to help you maintain your natural nails.
1. Always Use a Base Coat
A base coat isn’t just an extra step—it’s your nails’ best friend. It creates a protective barrier between your nails and the polish, preventing staining and discoloration. Plus, it helps the polish stick better, so your manicure lasts longer.
Pro Tip: Look for a base coat with strengthening ingredients like keratin or biotin. These can help fortify weak nails over time.
2. Don’t Skip the Top Coat
A top coat does more than add shine. It seals in the color and protects your nails from chipping. Reapplying a thin layer of top coat every few days can keep your manicure looking fresh and polished.
Reminder: Choose a quick-dry top coat if you’re short on time. It’s a lifesaver when you’re in a rush!
3. Limit Your Use of Acetone
Acetone-based removers can dry out your nails and cuticles, leaving them brittle. If possible, switch to a non-acetone remover. It’s gentler on your nails and still gets the job done.
Tip: After removing polish, wash your hands and apply a hydrating hand cream or cuticle oil to restore moisture.
4. Give Your Nails a Break
Your nails need time to breathe. Constantly wearing polish can weaken them and lead to peeling or splitting. Take a break every few weeks to let your nails recover. During this time, focus on nourishing them with oils and strengthening treatments.
5. File Your Nails the Right Way
Filing your nails incorrectly can cause splitting or breakage. Always file in one direction instead of sawing back and forth. Use a fine-grit file for a smooth finish.
Pro Tip: Keep your nails slightly rounded at the edges. This shape is less likely to snag or break.
6. Hydrate, Hydrate, Hydrate
Dry nails are more prone to breaking. Keep them hydrated by applying cuticle oil daily. A good hand cream can also work wonders for your nails and skin.
Reminder: Drink plenty of water, too. Hydration starts from the inside out!
7. Avoid Using Your Nails as Tools
It’s tempting to use your nails to open packages or scrape off stickers, but this can lead to cracks and chips. Treat your nails gently to keep them strong and healthy.
8. Stick to High-Quality Polishes
Cheap nail polishes often contain harsh chemicals that can damage your nails. Invest in high-quality, non-toxic polishes. Look for labels like "5-free" or "10-free," which indicate the absence of harmful ingredients.
Note: High-quality polishes may cost a bit more, but they’re worth it for the health of your nails.
By following these tips, you can enjoy the beauty of nail polish without compromising the health of your natural nails. A little extra care goes a long way in keeping your nails strong, shiny, and ready for your next manicure!
Acrylic Nails: Strength and Customization in Nail Treatments
Acrylic nails are a game-changer if you’re looking for strength and endless design possibilities. They’ve been a favorite in nail treatments for years, offering durability and a chance to express your unique style. Whether you want bold, artistic designs or a simple, polished look, acrylics can do it all.
Benefits of Acrylic Nails for Nail Strength and Design
Acrylic nails offer a mix of strength and creativity that’s hard to beat. Here’s why they’re such a popular choice:
-
They provide extra length and strength, protecting your natural nails from breaking.
-
You can customize them into shapes like almond, stiletto, square, or coffin to match your personal style.
-
Acrylics allow for limitless creativity. Think French tips, Ombre designs, or even intricate hand-painted art.
-
The materials bond with your natural nails, making them sturdier and less prone to damage.
-
With the added protection, your natural nails can grow longer and healthier over time.
If you love experimenting with colors and designs, acrylic nails are perfect. They let you go beyond what traditional nail polish can achieve, giving you a canvas for your creativity.
Risks and Challenges of Acrylic Nails
While acrylic nails have plenty of benefits, they come with some challenges. Knowing these risks can help you avoid potential problems:
-
Allergic reactions: Some people experience dryness, itching, or redness due to the chemicals used.
-
Weakened nails: The application and removal process can thin your natural nails, leaving them brittle.
-
Onycholysis: This condition, where the nail separates from the nail bed, increases the risk of infection.
-
Infections: Contaminated tools or improper application can lead to fungal or bacterial infections.
To minimize these risks, always visit a reputable salon or use high-quality products at home. Proper hygiene and careful application are key to keeping your nails healthy.
Application and Removal Process for Acrylic Nails
Applying and removing acrylic nails might seem tricky, but it’s manageable with the right steps. Here’s how you can do it:
Application:
-
Prep your nails by cleaning and buffing them. Push back your cuticles gently.
-
Apply nail tips or forms to create the desired length and shape.
-
Mix the acrylic powder and liquid, then apply the mixture to your nails using a brush.
-
Shape and smooth the acrylic as it hardens.
-
Finish with a top coat for a glossy, polished look.
Removal:
-
File down the top layer of the acrylic to break the seal.
-
Soak your nails in acetone for 20-30 minutes.
-
Gently scrape off the softened acrylic with a cuticle stick.
-
Hydrate your nails with cuticle oil to restore moisture.
Tip: Avoid peeling or forcing off acrylic nails. This can damage your natural nails and make them weaker.
Acrylic nails are a fantastic option if you want strength and style. With proper care and attention, you can enjoy stunning, long-lasting results while keeping your nails healthy.
Tips for Beginners Using Acrylic Nail Kits
Starting with acrylic nail kits can feel a bit overwhelming, but don’t worry—you’re not alone! With the right tools and a little practice, you’ll be creating stunning nails in no time. Here are some beginner-friendly tips to help you get started.
1. Choose a Beginner-Friendly Kit
Not all acrylic nail kits are created equal. Look for one that includes everything you need, like acrylic powder, liquid monomer, a brush, nail forms, and a file. Some kits even come with step-by-step instructions, which can be super helpful when you’re just starting out.
Tip: Read reviews before buying a kit. Other beginners can give you insights into which kits are easiest to use.
2. Prep Your Nails Properly
Preparation is key to a flawless acrylic application. Start by cleaning your nails and pushing back your cuticles. Buff the surface lightly to remove shine and create a rough texture for the acrylic to adhere to.
Reminder: Don’t skip this step! Proper prep ensures your acrylic nails last longer and look more professional.
3. Practice Mixing the Acrylic
Getting the right ratio of acrylic powder to liquid monomer takes practice. Too much liquid can make the mixture runny, while too much powder can make it clumpy. Aim for a consistency that’s smooth and easy to work with.
Pro Tip: Practice on a nail form or a fake nail before applying acrylic to your natural nails. This helps you get comfortable with the process.
4. Work in Small Sections
When applying acrylic, less is more. Start with small beads of the mixture and work on one nail at a time. This gives you more control and helps you avoid mistakes.
5. Shape and File Carefully
Once the acrylic hardens, shape your nails with a file. Be gentle to avoid damaging the acrylic or your natural nails. Use a fine-grit file for smoothing and a buffer for a polished finish.
Tip: Keep your file at a 45-degree angle for better control while shaping.
6. Take Your Time
Rushing through the process can lead to uneven nails or mistakes. Set aside enough time to focus on each step. Remember, practice makes perfect!
7. Clean Your Tools After Each Use
Acrylic can harden quickly, so clean your brushes and tools immediately after use. This keeps them in good condition and ready for your next manicure.
Reminder: Use a brush cleaner or soak your brushes in monomer to remove any leftover acrylic.
8. Don’t Skip Aftercare
Once your acrylic nails are done, hydrate your cuticles with oil and apply hand cream. This keeps your nails and skin healthy and prevents dryness.
Note: Give your natural nails a break between acrylic applications to keep them strong and healthy.
Starting with acrylic nail kits might feel tricky at first, but with these tips, you’ll gain confidence in no time. So grab your kit, take it step by step, and enjoy the process. You’ve got this!
Tips for Maintaining Healthy Nails Alongside Nail Treatments
Your nails deserve care and attention, especially if you’re regularly using nail treatments. By following a few simple steps, you can keep your nails healthy and strong while enjoying your favorite manicures.
Establishing a Proper Nail Care Routine
A proper nail care routine is the foundation of healthy nails. It’s not just about how your nails look—it’s about keeping them strong and free from damage. Here’s how you can create a routine that works:
-
Trim your nails regularly to prevent breakage and infections.
-
Clean your nails gently to remove dirt and bacteria. Use a nail brush for hard-to-reach areas.
-
Moisturize your nails and cuticles daily to avoid brittleness.
-
Soak your nails in warm, soapy water occasionally to loosen dirt and soften cuticles.
-
Disinfect your nails and cuticles to kill germs and reduce the risk of infections.
-
Exfoliate your hands and nails to remove dead skin cells and improve moisture absorption.
For extra protection, keep your nails clean and dry. Cut them straight across to maintain strength, and file them to avoid snags. These small habits go a long way in maintaining nail health.
Tip: Treat your nails like you treat your skin—clean, hydrate, and protect them daily.
Seeking Professional Advice for Nail Health
Sometimes, your nails need more than just at-home care. If you notice persistent issues like discoloration, peeling, or unusual growth, it’s time to consult a professional. A dermatologist or nail technician can help identify underlying problems and recommend effective solutions.
Professionals can also guide you on the best treatments for your nail type. Whether you’re dealing with weak nails or want to try a new nail treatment, their expertise ensures you’re making the right choices. Regular check-ins with a professional can prevent minor issues from turning into bigger problems.
Reminder: Don’t ignore signs of infection or damage. Early intervention keeps your nails healthy and strong.
Avoiding Common Mistakes in Nail Care and Maintenance
Even with the best intentions, it’s easy to make mistakes that harm your nails. Here are some common pitfalls to avoid:
-
Limit water exposure: Prolonged contact with water weakens nails. Wear gloves when washing dishes or cleaning.
-
Be gentle: Avoid using your nails as tools or digging under them. This prevents damage and infections.
-
Hydrate regularly: Just like your hair, your nails need hydration to stay healthy. Use cuticle oil and hand cream daily.
-
Protect against weather: Extreme temperatures and dry conditions can make nails brittle. Wear gloves in cold weather and moisturize often.
By avoiding these mistakes, you’ll keep your nails in great shape and ready for any manicure.
Pro Tip: Treat your nails with care, and they’ll reward you with strength and beauty.
Taking care of your nails doesn’t have to be complicated. With a proper routine, professional guidance, and a little extra attention, you can enjoy healthy nails alongside your favorite treatments.
Choosing the right nail treatment depends on your style, skill level, and nail health goals. Whether you prefer the durability of dip powder, the sleek finish of gel polish, the simplicity of traditional nail polish, or the creativity of acrylics, there’s an option for everyone.
Tip: Always prioritize high-quality products and follow proper application and removal techniques. This keeps your nails healthy and strong.
Your nails deserve the best care. So, explore your options, experiment with styles, and enjoy the journey to beautiful, healthy nails! 💅
0 comments
Previous

Next


Debunking Myths: Glue and A...
Explore the differences between nail glue, acrylic powder, and dip powder systems. Learn about their chemical compositions, durability, and resistance, and understand why using nail glue with acrylic powder is not the same as a dip powder system. Discover how each product works to achieve beautiful, long-lasting nails.

The 10 Most Dangerous DIY N...
DIY nail care has become wildly popular, but it’s not without risks. Improper techniques like overfiling or aggressive trimming can irritate...

Long-Term Nail Enhancements...
Long-term nail enhancements can weaken natural nails, cause brittleness, infections, and allergic reactions. Learn the hidden side effects and risks involved.